
6 Secret Tips For Supply And Demand Trading
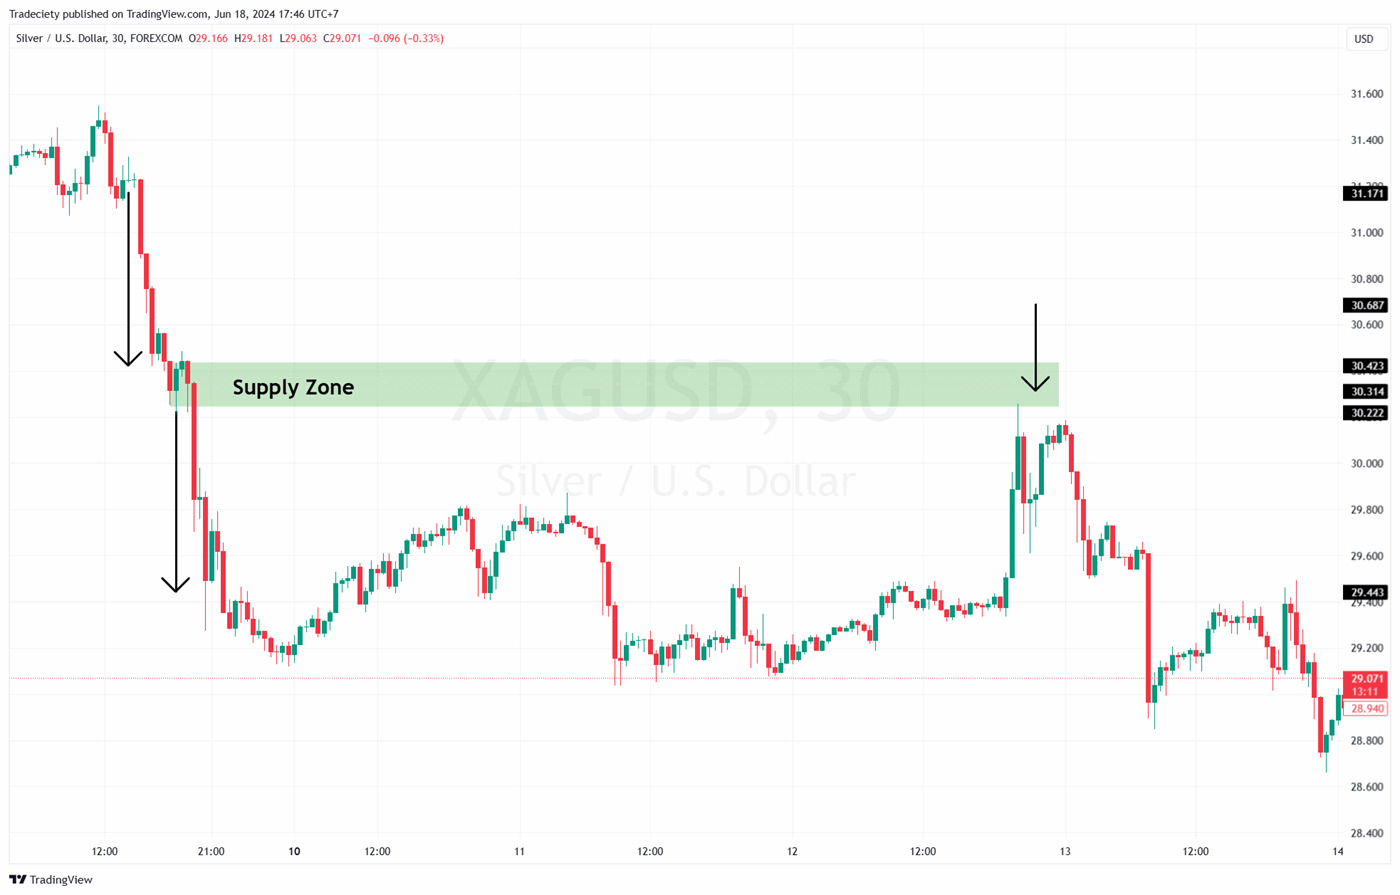
How to Identify High-Quality Supply and Demand Zones
Supply and Demand trading is one of the most effective price action techniques used by professional traders. Instead of relying heavily on indicators, this approach focuses on identifying areas where buyers or sellers previously entered the market with enough strength to create significant price movements.
These areas, known as Supply Zones and Demand Zones, often become important locations where price may react again in the future.
By learning how to identify these zones correctly, traders can improve their trade entries, reduce unnecessary risk, and better understand market behavior.
What Are Supply and Demand Zones?
Supply and Demand zones are areas on a price chart where there is a noticeable imbalance between buyers and sellers.
- Demand Zone – An area where buying pressure exceeded selling pressure, causing price to move upward.
- Supply Zone – An area where selling pressure exceeded buying pressure, causing price to decline.
These zones often act as future support or resistance because institutional traders may still have unfilled orders waiting there.
Why Are Supply and Demand Zones Important?
Supply and Demand zones help traders:
- Identify high-probability entry points.
- Locate potential market reversals.
- Improve risk-to-reward ratios.
- Find institutional trading areas.
- Filter low-quality trade setups.
- Trade with the overall market structure.
Instead of entering trades randomly, traders can wait for price to revisit these important zones before making a decision.
Supply and Demand vs. Support and Resistance
Although these concepts are closely related, they are not the same.
Support and Resistance
Support and resistance simply identify price levels where the market has previously reversed.
They are usually drawn at:
- Previous highs
- Previous lows
- Swing points
- Psychological price levels
Price often reacts quickly around these levels, sometimes making entries difficult.
Supply and Demand
Supply and Demand zones focus on where strong buying or selling originally started.
Instead of marking only the turning point, traders identify the consolidation area before the explosive move.
When price later returns to these zones, it frequently reacts because institutional orders may still remain there.
This makes Supply and Demand a more dynamic approach to understanding market behavior.
Characteristics of High-Quality Supply and Demand Zones
Not every Supply or Demand zone is worth trading.
Professional traders look for specific characteristics that increase the probability of success.
Below are some of the most important quality filters.
1. Moderate Volatility
One of the easiest ways to recognize a quality zone is by observing price behavior before the breakout.
High-Quality Zone
- Small candles
- Tight consolidation
- Minimal candle wicks
- Clear price compression
Low-Quality Zone
- Large candles
- Excessive volatility
- Long candle wicks
- Constant back-and-forth movement
A clean and narrow consolidation usually indicates strong institutional accumulation or distribution.
When price eventually breaks out with momentum, it often leaves behind a powerful Supply or Demand zone.
Bonus Tip: Wyckoff Accumulation
Before many strong bullish moves, price enters an accumulation phase.
During this period:
- Institutions quietly build large positions.
- Retail traders often lose interest.
- Price moves sideways with low volatility.
Once enough buying pressure builds, price breaks out aggressively, creating a strong Demand Zone.
Learning to identify accumulation can significantly improve the quality of your Demand Zone analysis.
2. Short Consolidation (Timely Exit)
Quality Supply and Demand zones usually spend very little time consolidating.
The market pauses briefly before making a powerful move.
This behavior indicates a strong imbalance between buyers and sellers.
The shorter the consolidation, the stronger the institutional conviction behind the move.
Look For
- Only a few candles inside the base.
- Strong breakout immediately afterward.
- Minimal hesitation.
Long periods of sideways movement often reduce the effectiveness of a Supply or Demand zone.
Bonus Tip: Drop–Base–Drop Pattern
One of the strongest bearish Supply Zone formations is known as:
Drop ? Base ? Drop
This pattern consists of:
- Strong bearish movement.
- Short consolidation.
- Another aggressive bearish move.
It suggests institutions resumed selling after briefly pausing.
The opposite bullish pattern is called:
Rally ? Base ? Rally
This often creates a high-quality Demand Zone.
3. The Wyckoff Spring Pattern
The Spring is one of the most well-known concepts from Wyckoff Theory.
It occurs when price briefly breaks below support before quickly reversing higher.
At first glance, it appears to be a bearish breakout.
In reality, it often traps retail traders into selling while institutions quietly accumulate buy positions.
This false breakout is commonly referred to as a Bear Trap.
Why the Spring Matters
A successful Spring often indicates:
- Institutional buying.
- Liquidity collection.
- Strong market imbalance.
- Potential bullish reversal.
Many experienced traders wait for a Spring before considering long positions from a Demand Zone.
Additional Factors That Strengthen a Zone
Experienced traders often combine several confirmations before entering a trade.
These include:
- Strong breakout momentum.
- Fresh, untested zones.
- High trading volume.
- Trend alignment.
- Liquidity sweep.
- Market structure confirmation.
- Bullish or bearish candlestick patterns.
The more confirmations present, the higher the probability of a successful trade.
Common Beginner Mistakes
Many new traders make these mistakes when using Supply and Demand:
- Drawing too many zones.
- Trading every zone without confirmation.
- Ignoring the higher timeframe.
- Entering before price confirms the setup.
- Forgetting risk management.
- Chasing trades after the breakout.
Remember, patience is often the difference between professional and emotional trading.
Best Practices for Supply and Demand Trading
To improve consistency:
- Start your analysis from higher timeframes.
- Mark only fresh and obvious zones.
- Wait for price to revisit the zone.
- Confirm the setup before entering.
- Use stop-loss orders.
- Follow proper position sizing.
- Keep a trading journal to review your setups.
Consistency comes from following a repeatable process rather than chasing every market move.
Final Thoughts
Supply and Demand zones provide traders with a practical way to understand where significant buying and selling activity has occurred in the past and where it may occur again. By focusing on the origin of strong market moves rather than just traditional support and resistance levels, traders can identify higher-probability trade setups and gain a clearer understanding of institutional market behavior.
However, the key to success lies in selecting high-quality zones, waiting for confirmation, and combining Supply and Demand analysis with sound risk management and overall market structure. No strategy is perfect, but applying these principles consistently can significantly improve your decision-making.
At Profit & Profit Academy, we teach traders how to identify, validate, and trade Supply and Demand zones using real market examples and structured trading techniques. With patience, practice, and discipline, Supply and Demand can become one of the most valuable tools in your trading strategy.